Project Deny – Week 1 & 2
- Emily Brown

- Feb 2, 2020
- 3 min read
Updated: Mar 8, 2020
This blog will be updated every week until May 1st, this will follow the production of my final year project at University, in the subject of Games Art.
This will be the first of many blog posts which will be documenting my progress throughout my final year project. We are allowed to create anything we wish, it is up to ourselves to manage the project from start to finish.
I will have guidance from some of my good friends in the games industry such as Stewart Pirie from Double Eleven and James Montague from Radical Forge, alongside getting weekly feedback from my university lecturers.
Project Overview
The concept art I chose to work from is ‘Oakland Hackerspace’ and original piece of concept art from the game Watch Dogs 2, this was a piece they had used but changed a lot of for the final project. I will be mainly following this concept piece whilst adapting it to my likes and interests, to tell a story yet to be decided.
Throughout this project, I will be aiming for a photo-realistic style and showcasing the environment in Unreal Engine 4.

Oakland Hackerspac Concept Art – Watch Dogs 2 – Nacho Yague
Original Ideas
My original idea was to create a back alley set in Japan, inspired by Liam Wong on Twitter (@liamwong). However I changed my mind after talking to my supervisor at university, this being because I wanted to see if I could challenge myself a bit more.
So I decided to go back to the drawing board and look for more ideas by creating new mood boards. This was when I came across the ‘Oakland Hackerspace’ concept art created by Nacho Yague. I liked the idea of creating a hackerspace, but instead of creating the environment on a boxing ring, I brought in my own interests in wrestling and decided to set up my environment with a wrestling ring instead.

Minutes to Midnight © Liam Wong – https://www.liamwong.com
Pre- Production
So I don’t like researching all too well when I create my assets/environments, so this project so far has helped me to do so. I started by making a brand new Pureref file and just started to collect a lot of reference for this project whilst watching some shows. Creating this reference file makes it easier for me when I get around to doing the texturing for the scene as I can refer back to it constantly throughout the project.
I then started making my blockout, keeping it simple at first so I can keep adding more detail to it as I go along.
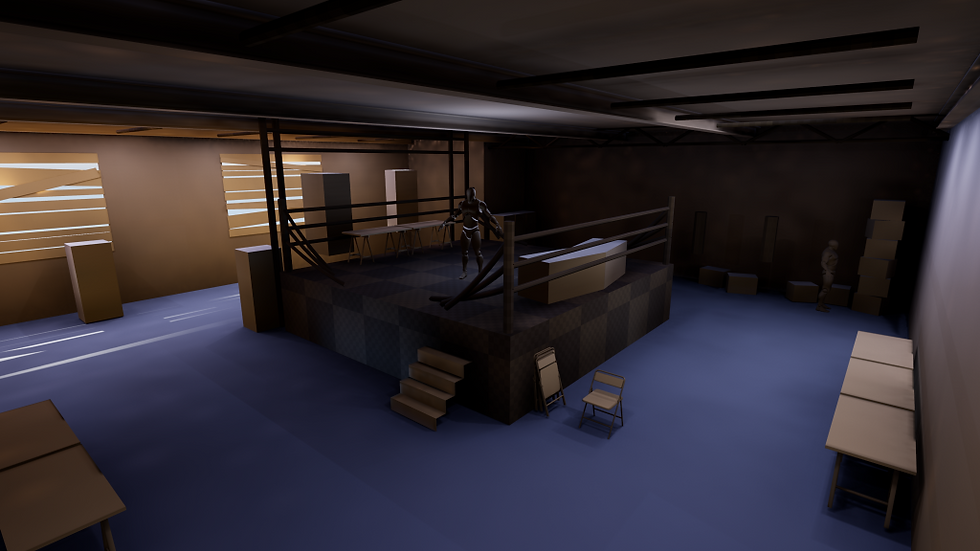
I wanted to get an initial lighting test done before I started my asset creation fully. But when I was starting this I realised I hadn’t seen the perspective correctly in the concept art. So I had to redo the blockout a bit and make the room more to scale rather than just throwing a bunch of box brushes everywhere.

As you can see in the above screenshot I started making a few of the assets in the scene. This being so I wouldn’t burn my self out too early by only focusing on one thing.
One of my main goals throughout this project is to create tools to make it easier and more efficient to create this environment. I knew I was going to have a lot of cables around my scene so I got in touch with James Montague to see how he would do it. He referred me to a video on making my own custom spline tool to create the cables in the room using a blueprint actor.
I had issues originally from following this video due to it being on an earlier version of Unreal Engine, that being that when I placed the actor in the scene it would create the asset at 0,0,0 in the scene so it was hard to control. So I went back to James to get some more help and help me figure out what to do to fix the issue.

Whats Next?
Next week I want to get the final blockout done and have a finished lighting pass done. I’m also going to look into how to make trim sheets so I can minimize how much data is put into the engine, and to be more efficient with my materials.
Catch you all later 😉
Em x


Comments